Pod Lifecycle
NotePods follow a predefined lifecycle, starting from the
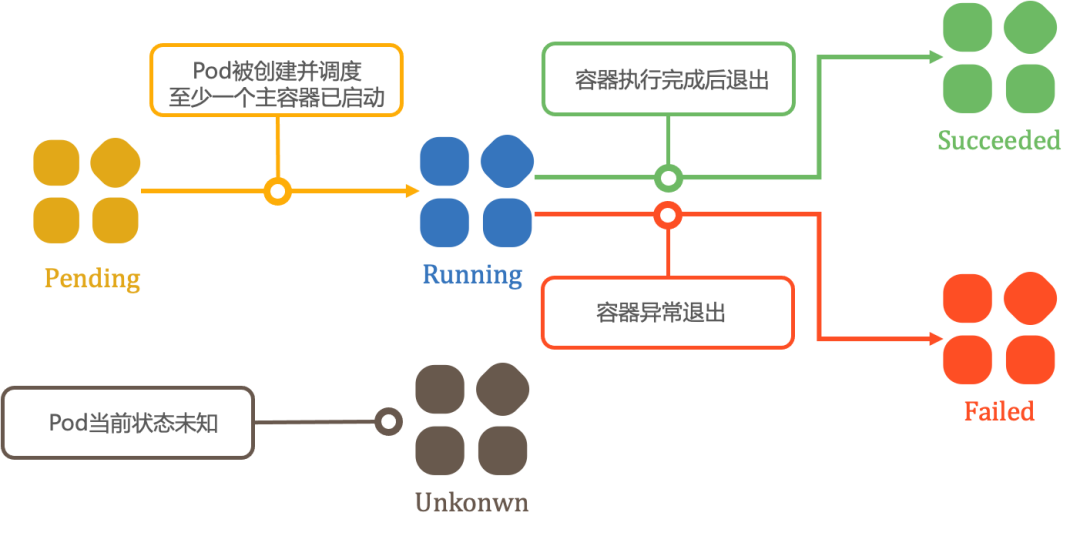
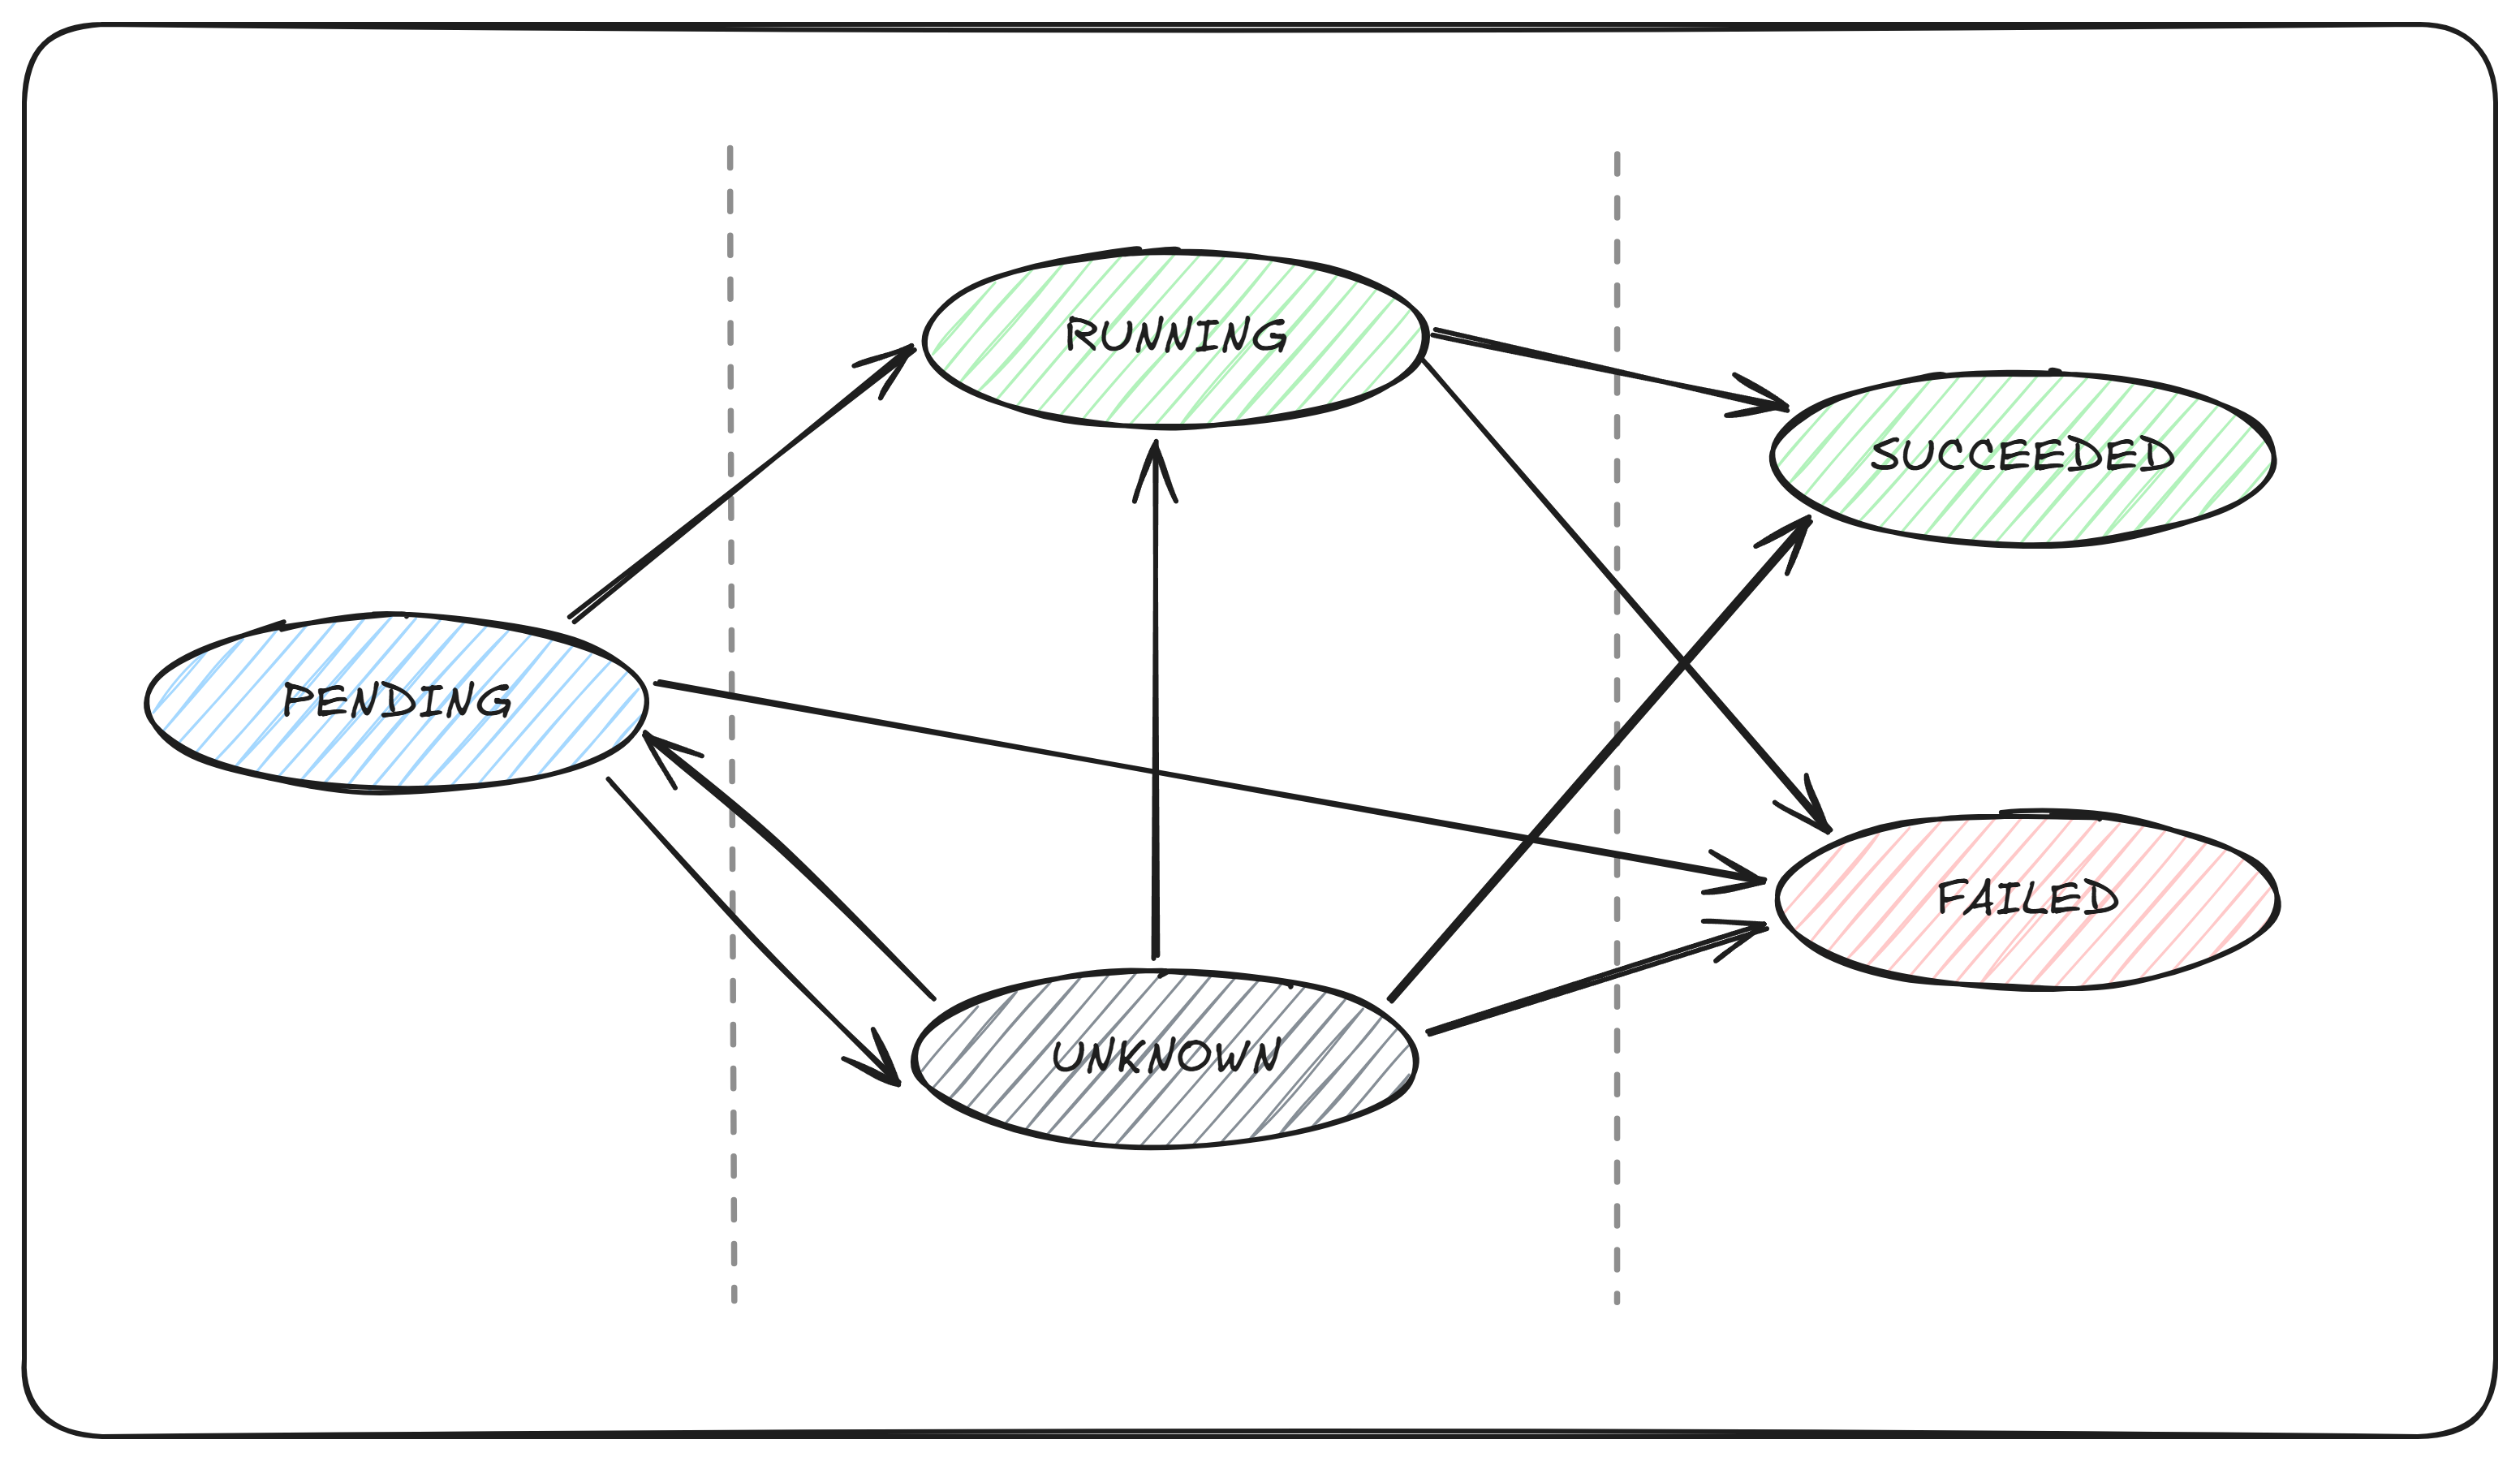
Pendingphase. If at least one primary container starts successfully, the Pod transitions to theRunningphase. Subsequently, depending on whether any container in the Pod exits with a failure status, it enters either theSucceededorFailedphase.When a Pod is deleted, some kubectl commands may display its status as
Terminating. ThisTerminatingstate is not one of the official Pod phases.
| Phase | Description |
|---|---|
Pending |
The Pod has been accepted by the Kubernetes system, but one or more containers have not been created or started. This phase includes time spent waiting for scheduling and downloading container images. |
Running |
The Pod is bound to a node, and all containers have been created. At least one container is still running, starting, or restarting. |
Succeeded |
All containers in the Pod have terminated successfully and will not be restarted. |
Failed |
All containers in the Pod have terminated, and at least one container exited due to failure (e.g., exited with a non-zero status or was terminated by the system without automatic restart configured). |
Unknown |
The Pod status cannot be retrieved, typically due to communication failures with the node hosting the Pod. |
Container States
Kubernetes monitors the state of each container within a Pod, similar to how it tracks the Pod lifecycle.
Once the scheduler assigns a Pod to a node, the kubelet initiates container creation for the Pod through the container runtime. A container can be in one of three states: Waiting, Running, or Terminated. To inspect the state of containers in a Pod, use kubectl describe pod <pod-name>. The output includes the status of each container within the Pod.
Each state has specific implications:
Waiting
If a container is neither in the Running nor Terminated state, it is Waiting. A container in the Waiting state is still performing operations required to start successfully, such as pulling a container image from a registry or applying ConfigMap/Secret data to the container.
Running
The Running state indicates that the container is actively executing and functioning without issues.
Terminated
A container in the Terminated state has completed execution, either normally or due to a failure.
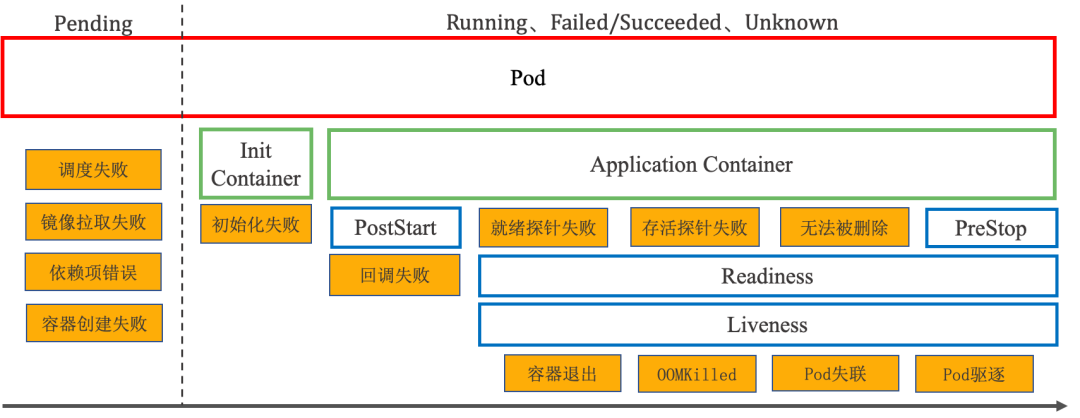
Pod Failure Scenarios
A Pod may encounter various exceptions during its lifecycle. Based on whether its containers are running, these failure scenarios can be broadly categorized into two groups:
- Exceptions during container creation: These occur while the Pod is being scheduled or its containers are being created. The Pod remains stuck in the Pending phase.
- Exceptions during container execution: These occur while containers are running. The Pod’s stage varies depending on the specific scenario.
4. Container Probes
NoteProbes are a mechanism used by kubelet to periodically check the status of containers. To perform a check, kubelet can execute code inside the container or make a network request.
Liveness Probe
What is a Liveness Probe?
A liveness probe determines whether a container is running. If the probe fails, the kubelet kills the container, and the container is subjected to the restart policy.
If a container’s liveness probe fails multiple times, the kubelet will restart the container. If the liveness probe fails, the kubelet will kill the container, and the container will be subjected to the restart policy. If a container does not provide a liveness probe, the default status is Success.
The liveness probe does not wait for the readiness probe to succeed. If you want to wait for the liveness probe to execute before the readiness probe, you can define initialDelaySeconds, or use the startup probe.
When to Use a Liveness Probe?
If a container’s process can crash on its own, you may not need a liveness probe; kubelet will automatically restart the container based on the restartPolicy.
If you want the container to be killed and restarted when the probe fails, specify a liveness probe and set the restartPolicy to “Always” or “OnFailure”.
Readiness Probe
What is a Readiness Probe?
A readiness probe determines when a container is ready to accept traffic. This probe is useful when waiting for an application to perform time-consuming initial tasks, such as establishing network connections, loading files, and warming up caches.
If the readiness probe returns a failure status, Kubernetes removes the Pod from the endpoints of all associated Services.
The readiness probe continues to run throughout the container’s lifecycle.
When to Use a Readiness Probe?
Specify a readiness probe if you want to start sending traffic to a Pod only after the probe succeeds. In this case, the readiness probe might be the same as the liveness probe. However, the presence of a readiness probe in the specification ensures that the Pod does not receive any data during the startup phase and only starts receiving traffic after the probe succeeds.
You can also define a readiness probe if you want the container to enter a maintenance state independently. This probe should check a readiness-specific endpoint, which differs from the liveness probe.
If your application has strict dependencies on backend services, implement both liveness and readiness probes. After the liveness probe confirms the application is healthy, the readiness probe can perform additional checks to verify the availability of required backend services. This helps avoid directing traffic to Pods that might return errors.
For containers requiring large data loading, configuration file processing, or migrations during startup, use a startup probe. However, if you need to distinguish between a failed application and one still initializing, a readiness probe may be more appropriate.
Startup Probe (startupProbe)
What is a Startup Probe?
A startup probe checks whether an application within a container has started. It is designed for containers with slow startup times to prevent kubelet from terminating them prematurely before they begin running.
If configured, this probe disables liveness and readiness checks until the startup probe succeeds.
The startup probe executes only during the container’s initialization phase, unlike the readiness probe, which runs periodically.
When to Use a Startup Probe?
The startup probe is useful for Pods that contain containers requiring extended time to become ready. Instead of configuring a long liveness probe interval, you can set up a separate configuration option to probe the container during startup. This allows exceeding the duration permitted by the liveness check interval by a significant margin.
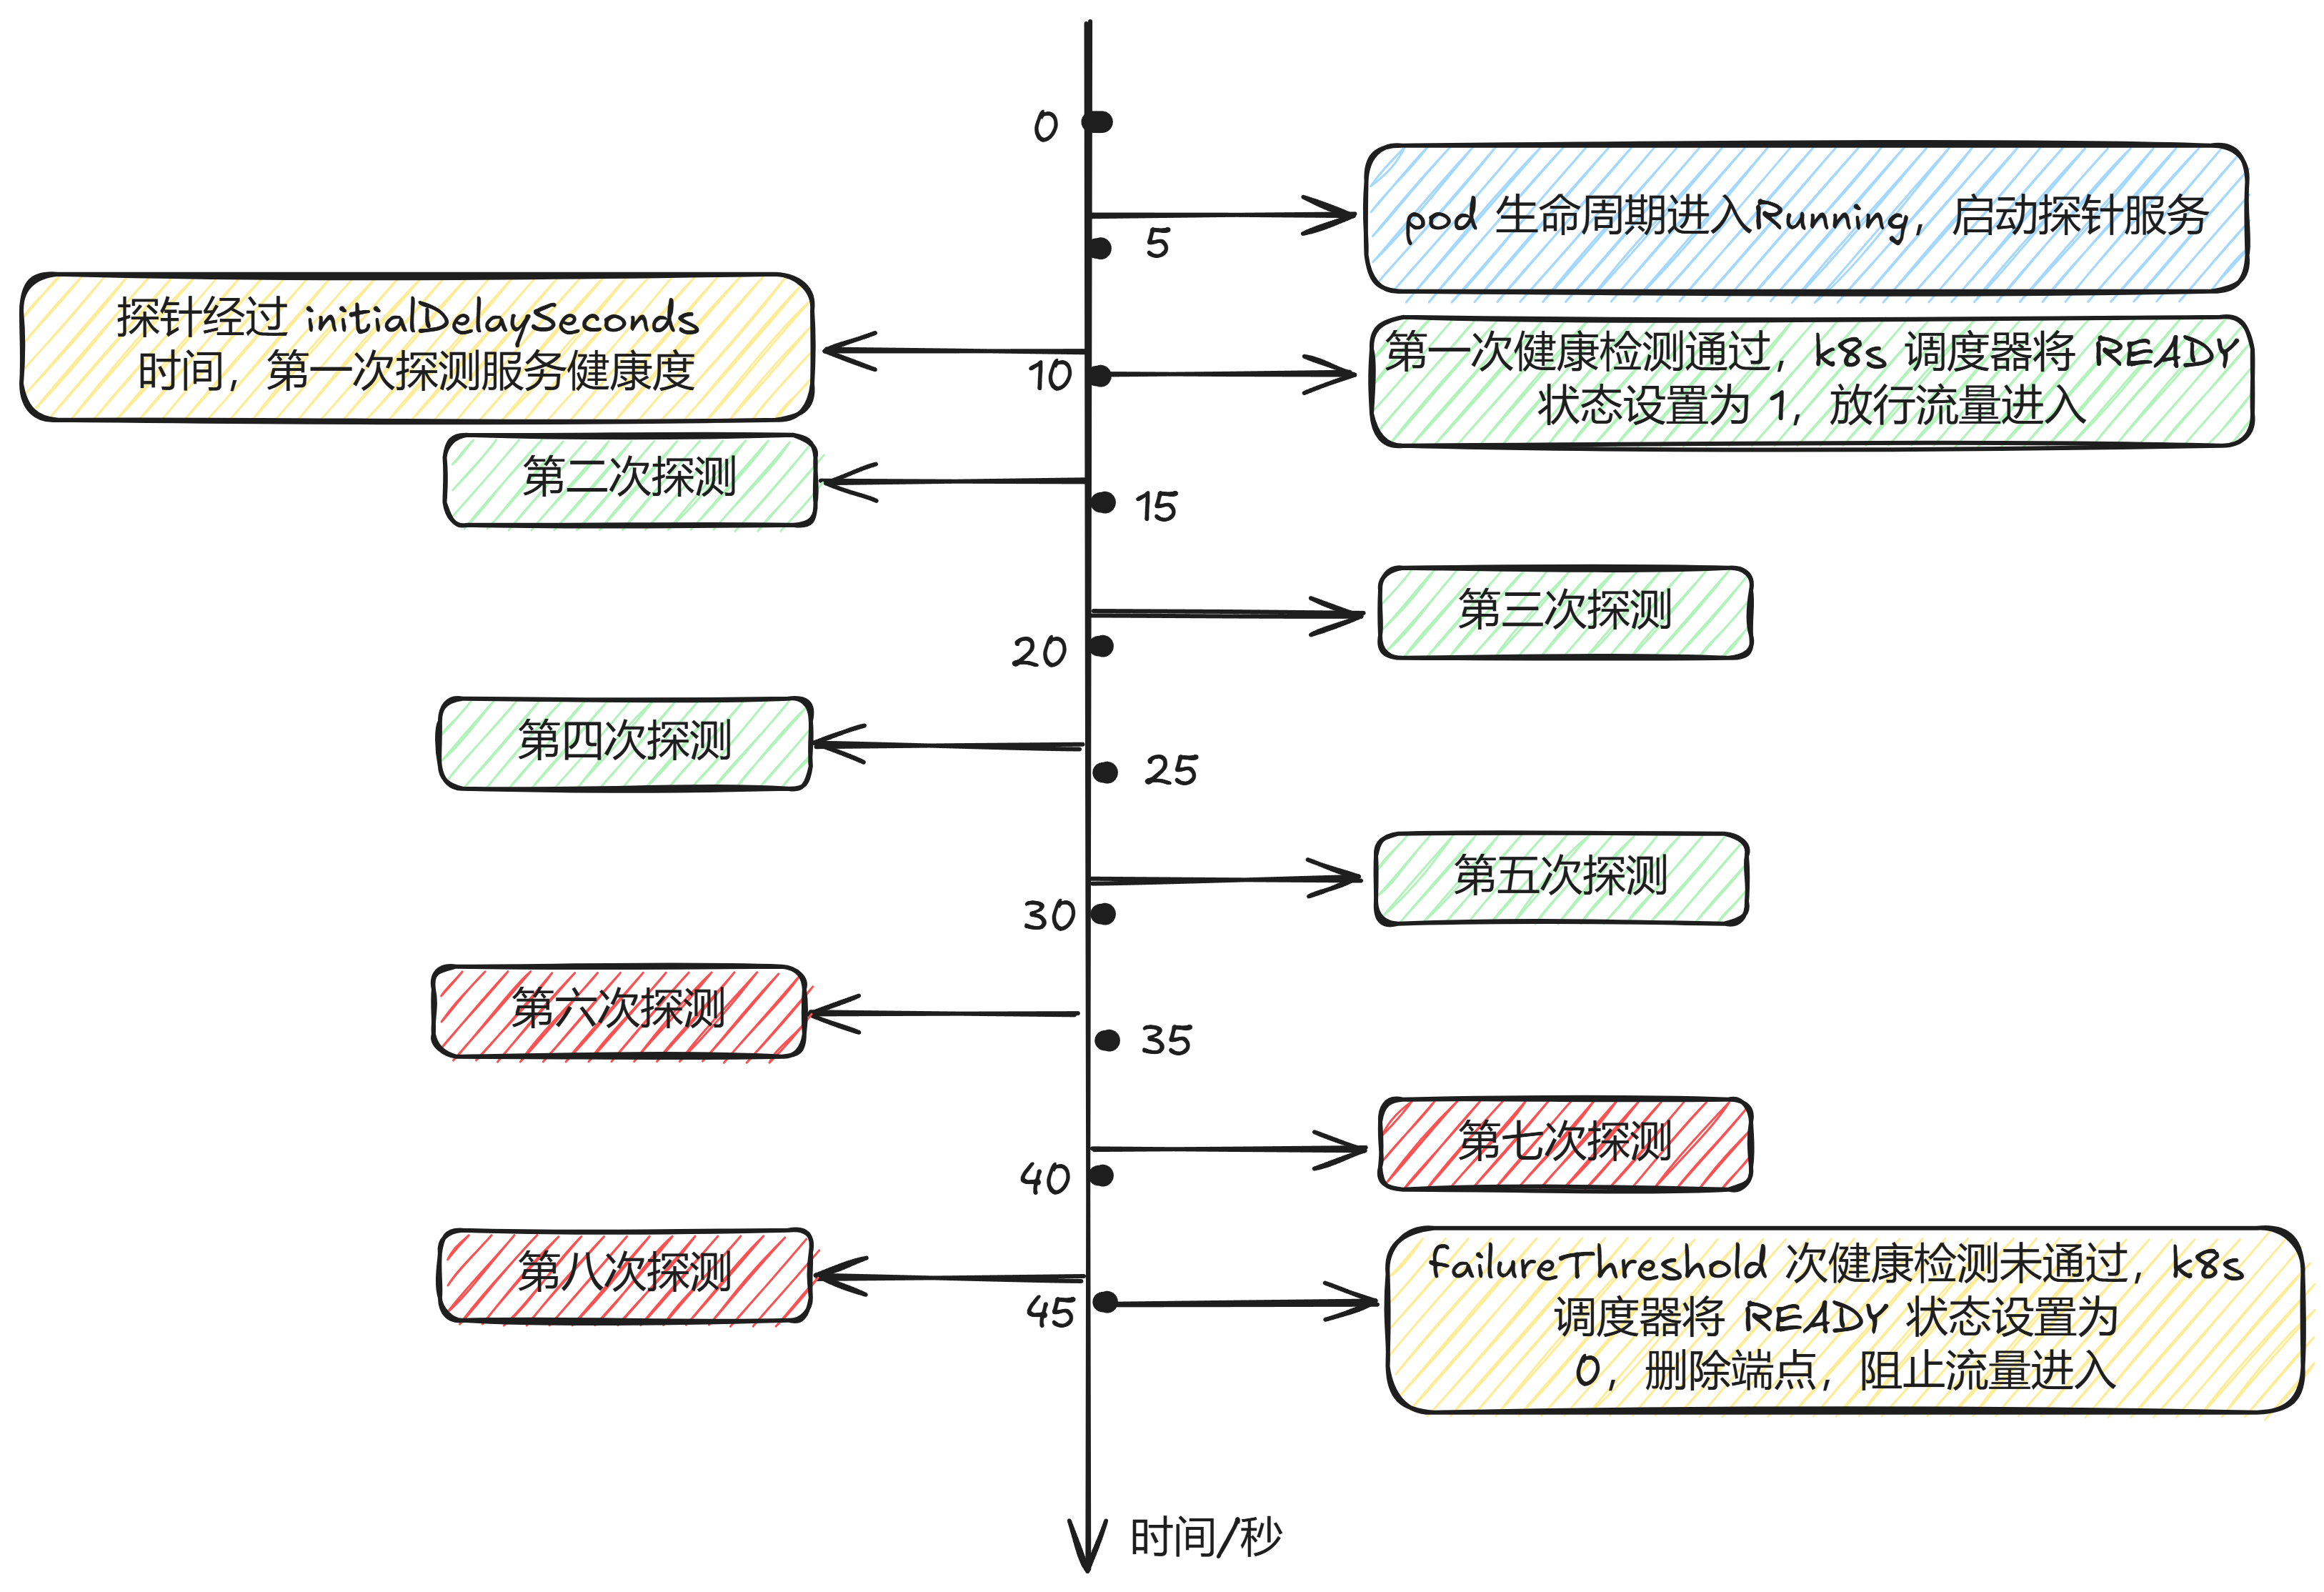
If a container’s startup time typically exceeds the total value of initialDelaySeconds + failureThreshold × periodSeconds, a startup probe should be configured to check the same endpoint used by the liveness probe. The default value for periodSeconds is 10 seconds. Set its failureThreshold high enough to ensure sufficient startup time for the container while retaining the default values for the liveness probe. This configuration helps mitigate deadlock scenarios.
Probe Execution
| Probe | Target | Action | Effect | Runtime |
|---|---|---|---|---|
| Liveness | Container | Restart | Restart container | Entire container lifecycle |
| Readiness | Endpoint | Remove | Remove from service endpoints (no traffic) | Entire container lifecycle |
| Startup | Container | Restart | Restart container | Executed once after container starts Running |
Probe Usage
There are four different methods to use probes to check containers. Each probe must be precisely defined as one of these four mechanisms:
| Probe Type | Description |
|---|---|
exec |
Executes a specified command inside the container. The diagnosis is considered successful if the command exits with a status code of 0. |
tcpSocket |
Performs a TCP check on the specified port of the container’s IP address. The diagnosis is successful if the port is open. If the remote system (container) closes the connection immediately after opening it, this is still considered healthy. |
httpGet |
Sends an HTTP GET request to the specified port and path on the container’s IP address. The diagnosis is successful if the response status code is between 200 and 399 (inclusive). |
grpc |
Uses gRPC to perform a remote procedure call. The target should implement the gRPC health check. If the response status is “SERVING”, the diagnosis is considered successful. |
| Probe Parameters | Description |
|---|---|
initialDelaySeconds |
Number of seconds to wait after the container starts before initiating startup, liveness, and readiness probes. If a startup probe is defined, the delays for liveness and readiness probes will begin only after the startup probe succeeds. If periodSeconds is greater than initialDelaySeconds, initialDelaySeconds is ignored. The default is 0 seconds, and the minimum value is 0. |
periodSeconds |
Interval (in seconds) at which probes are executed. The default is 10 seconds. The minimum value is 1. |
timeoutSeconds |
The number of seconds to wait after a probe times out. Default is 1 second. Minimum value is 1. |
|---|---|
successThreshold |
Minimum consecutive successes required for a probe to be considered successful after failure. Default is 1. For liveness and startup probes, this value must be 1. Minimum value is 1. |
failureThreshold |
After failureThreshold consecutive failures, Kubernetes considers the overall check failed: container status becomes unready/unhealthy/inactive. Default is 3, minimum is 1.For liveness or startup probes: If ≥ failureThreshold probes fail, Kubernetes triggers container restart (following terminationGracePeriodSeconds).For readiness probes: kubelet continues executing failed probes but marks Pod’s Ready condition as false. |
terminationGracePeriodSeconds |
Configures the grace period for kubelet to wait between triggering container termination and forcing runtime stop. Default inherits Pod-level value (30s if unset). Minimum is 1. Added in Kubernetes v1.25, only effective for startup and liveness probes. |
Example
|
|
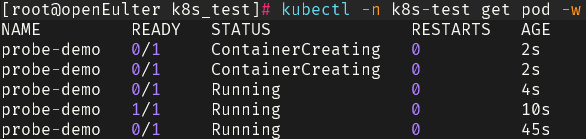
Practical Demonstration
Process Analysis